Revision note: proposed update to the existing KB article of the same title, based on hands-on testing of 2 real connectors (Shopify OAuth2 + ECGrid ApiKey/SOAP) end-to-end: SDK runtime -> Postman -> real Portal Register/Connection/Flow. New content is marked with a pin: Real-world testing note. Nothing marked this way replaces the original text - it adds context that wasn't obvious from the SDK or the original guide alone.
Writing a Custom Connector with Simplify.Connectors.SDK
Audience: partners/devs writing a connector to integrate a third-party system into SimplifyV2.
1. Project setup
1.1. Getting the package
Simplify.Connectors.SDK (currently 0.1.0) is a standard NuGet package but has not been published to any public/internal feed - partners get the .nupkg file directly one of two ways:
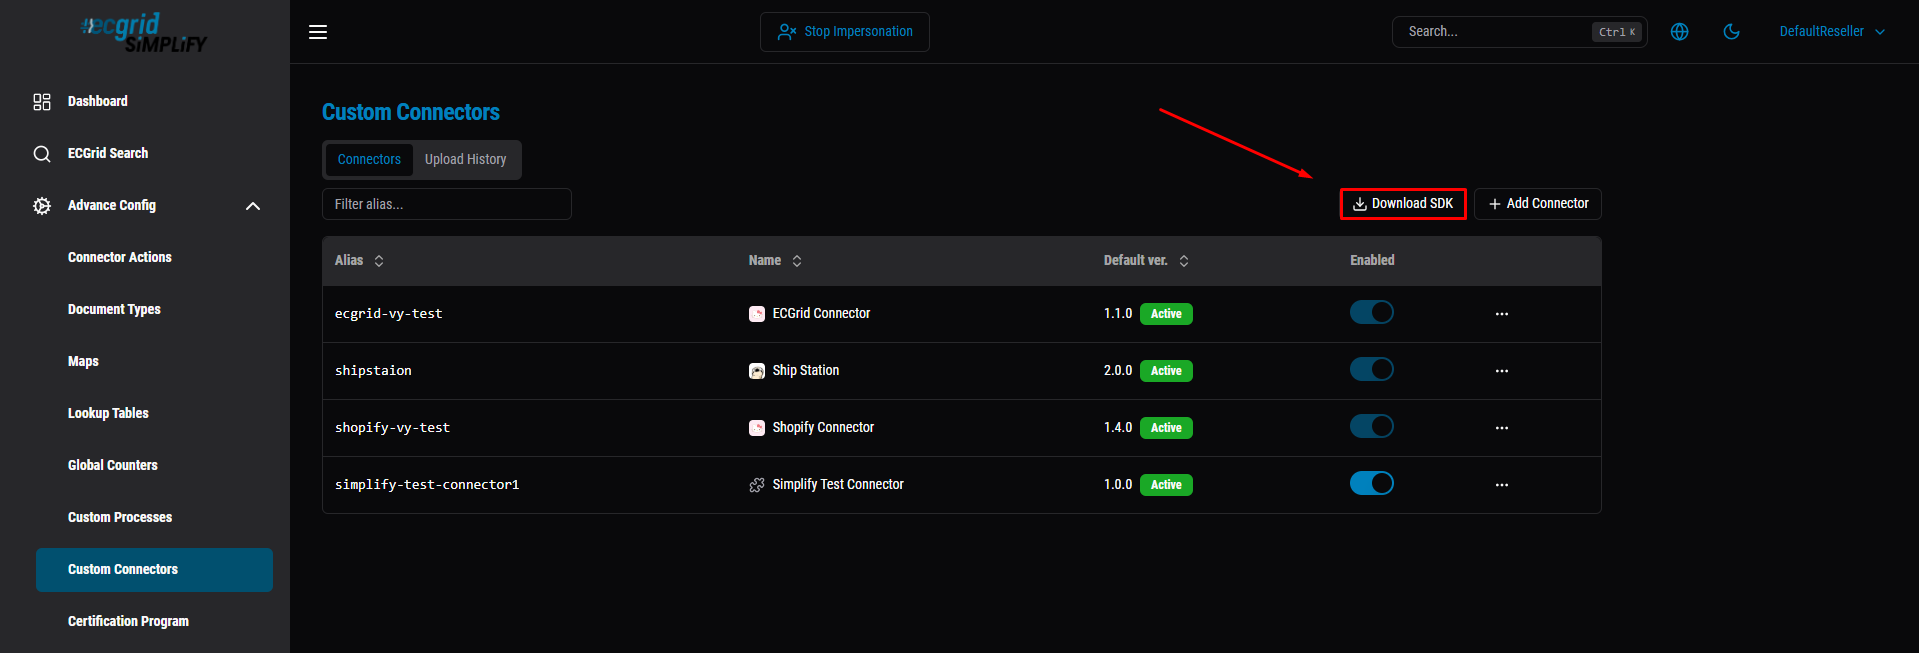
- Portal -> Custom Connector page -> Download SDK button.
- Direct download link provided by the Simplify team.
Real-world testing note: the version label on the download page/filename is not necessarily the version to declare in PackageReference. The .nupkg we tested with was named Simplify.Connectors.SDK.0.1.0.nupkg, but the version actually recorded in its .nuspec was 0.1.0-dev.20260910080547. Declaring Version="0.1.0" (matching the filename) fails restore with "package not found". Always confirm the real version first, and use exactly what it prints - not the filename:
dotnet package search Simplify.Connectors.SDK --source ./local-packages --prerelease1.2. Requirements
- .NET SDK 10.0+ (
dotnet --version; download from dotnet.microsoft.com if missing). - The .nupkg file above.
1.3. Creating the project
dotnet new classlib -n MyConnector -f net10.0 cd MyConnector- The classlib template is mandatory - the Runner loads the connector as a DLL via AssemblyLoadContext, it does not run a Main.
-f net10.0must match the SDK's target framework exactly.- Delete the default Class1.cs.
Real-world testing note: when building more than one connector (e.g. one for each third-party system), put each IConnector implementation in its own project/DLL. A single DLL with two IConnector classes leaves the Portal with no way to tell Register which one to load.
2. Required interface: IConnector
Just one interface, no base class to inherit from:
public interface IConnector { void Configure(IConnectorBuilder builder); }Hard constraint: Configure must be idempotent, no I/O, no side effects. The SDK calls it both during Describe (once at Register/Upload) and on every single Invoke (Authenticate/Trigger/Action).
There are no attributes/annotations - everything is declared through the fluent builder inside Configure.
3. Fluent builder API
The builder implementation is internal sealed - you never new it directly, you only receive it via a lambda.
Method | Used for |
|---|---|
| Name, version, list of hosts the connector may call out to |
| Declares the authentication mechanism |
| Field the customer fills in when connecting |
| Auth handler |
| OAuth2 only - generates the redirect URL |
| Polling trigger |
| Push trigger |
| 1 action = 1 handler |
Real-world testing note (SDK gap): Field() is only available on IAuthBuilder and the schedule-trigger builder (IScheduleTriggerBuilder) - confirmed by reflecting directly over Simplify.Connectors.SDK.dll. IActionBuilder has no Field() at all, only Handle(...). In practice this means an Action cannot declare its own input fields for the Portal to render - if an action needs parameters beyond ctx.Input (the previous flow step's document), there is currently no supported way to collect them through the Portal UI. Workaround used during testing: read the values from ctx.Config directly in code, which only works when invoking through ConnectorRuntime.Invoke in a local test script (you supply Config yourself); it does not work through a real Portal-driven Action, since the Portal never collected the field. Worth raising with the SDK team if Actions need configurable, per-flow parameters.
Real-world testing note: ConnectorResult.Content is a string, not a JsonElement (the original pseudocode's new ConnectorResult { Content = json, ExternalId = id } reads like json could be a JsonElement - it must already be a serialized string, e.g. from JsonSerializer.Serialize(...) or res.Content.ReadAsStringAsync()).
4. IConnectorContext - the object passed into every handler
Property | Meaning |
|---|---|
| Fields the customer entered when connecting/updating |
| Opaque auth blob from the most recent successful |
| Data from the previous flow step, or the webhook request body |
| Alias for |
| See section 5 |
|
|
| Writes a log line, capped at 200 lines x 2000 characters |
5. ctx.Http - a convention, not a real sandbox
ctx.Http is pre-wired with an egress allowlist and 401 detection. Building your own HttpClient/socket is rejected at upload time (static PE scan) and blocked again at the network layer at runtime - always use ctx.Http.
Real-world testing note: this middleware (egress allowlist enforcement, automatic 401 -> ConnectorAuthenticationException) only exists in Simplify's real runtime infrastructure. If you hand-roll an IConnectorContext with a plain HttpClient to unit-test a connector locally via ConnectorRuntime.Invoke, none of this middleware runs - you cannot verify egress blocking or auto-401-retry behavior this way. We were unable to get a clean, reproducible test of egress blocking even through the real Portal (a stale-code caching issue, see section 11, kept confounding the result) - treat this as a known testing gap, not a confirmed-working feature.
6. Handling authentication errors
A bare HTTP 401 via ctx.Http (except on the Authenticate request itself) is automatically thrown as ConnectorAuthenticationException. Simplify then calls OnAuthenticate again exactly once, with ctx.Auth set to the old auth blob, and retries the original request once.
ConnectorEntrypointNotFoundException is thrown automatically when key/kind doesn't match any registered trigger/action.
Real-world testing note (confirmed, both parts): ConnectorEntrypointNotFoundException was verified directly - calling ConnectorRuntime.Invoke with an unregistered trigger/action key throws it automatically with a clear message, no connector code needed. The 401-auto-refresh path, however, could not be exercised end-to-end for a connector whose upstream API issues non-expiring tokens (e.g. Shopify's offline access token, which has no expires_in and does not expire on its own). In that case a 401 normally means the token was revoked outright (app uninstalled, access revoked) rather than "expired" - there is no refresh token to use, and OnAuthenticate should return AuthResult.Failure(...) telling the user to fully reconnect, not attempt a refresh the provider doesn't support. Worth documenting per-provider whether their token type is refreshable at all before assuming this retry path applies.
7. Credentials - 3 sources, don't confuse them
Source | SDK property | Who stores it |
|---|---|---|
Field the customer entered |
| Application layer |
Constants the connector hard-codes | Doesn't go through the SDK | Connector author |
Auth blob from |
| Simplify (opaque) |
Safety notes: secret: true only masks the UI input, it's not encryption. AuthJson travels as plaintext on the Service Bus queue. Never log secrets via ctx.Log().
8. Webhook URL - where does it come from
AddWebhookTrigger only declares the handler; the SDK does not register the webhook with the third-party system. The URL format is:
{scheme}://{host}/api/webhooks/custom/{alias}/{connectionId}/{triggerKey}?token={webhookSecret}
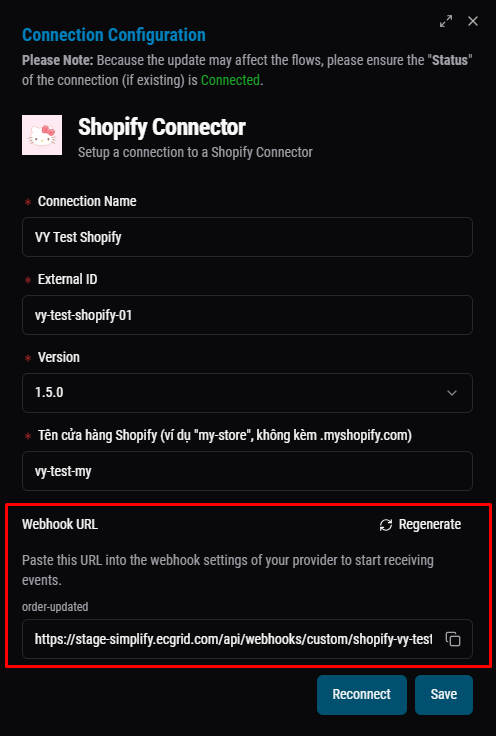
Note: My Connections only shows up under the Customer role - a user logged in with the Reseller role does not have it.
Real-world testing note: confirmed end-to-end on a real Shopify connection. The Portal generated the URL correctly once the Connection existed; registering it with Shopify's Admin API required the access token in the request headers, not query params (a 401 the first time was traced to this). After fixing that, 201 Created, and editing an order on Shopify triggered the flow to Completed on the very first real webhook delivery.
9. Packaging & upload
- Build/publish then zip together with
.deps.json- mandatory. - Do not put
Simplify.Connectors.SDK.dllinside the zip. - Zip <= 50MB, alias globally unique
[a-z0-9-]{1,37}, version must be valid SemVer. - Egress hosts in
Metadata(egressHosts:...)are auto-approved against the system's allowed list.
Real-world testing note: all of the above was verified working as described (packaging without the SDK dll, alias/version rules, egress host template resolution like {shopDomain}.myshopify.com). See section 11 for a caching issue observed after Upload Version + Set as Default.
10. Step-by-step on the Portal: Register, Connect, build a Flow
1. Log in: go to the Simplify Portal URL given by your Simplify contact, sign in with the partner/dev account provisioned for you.
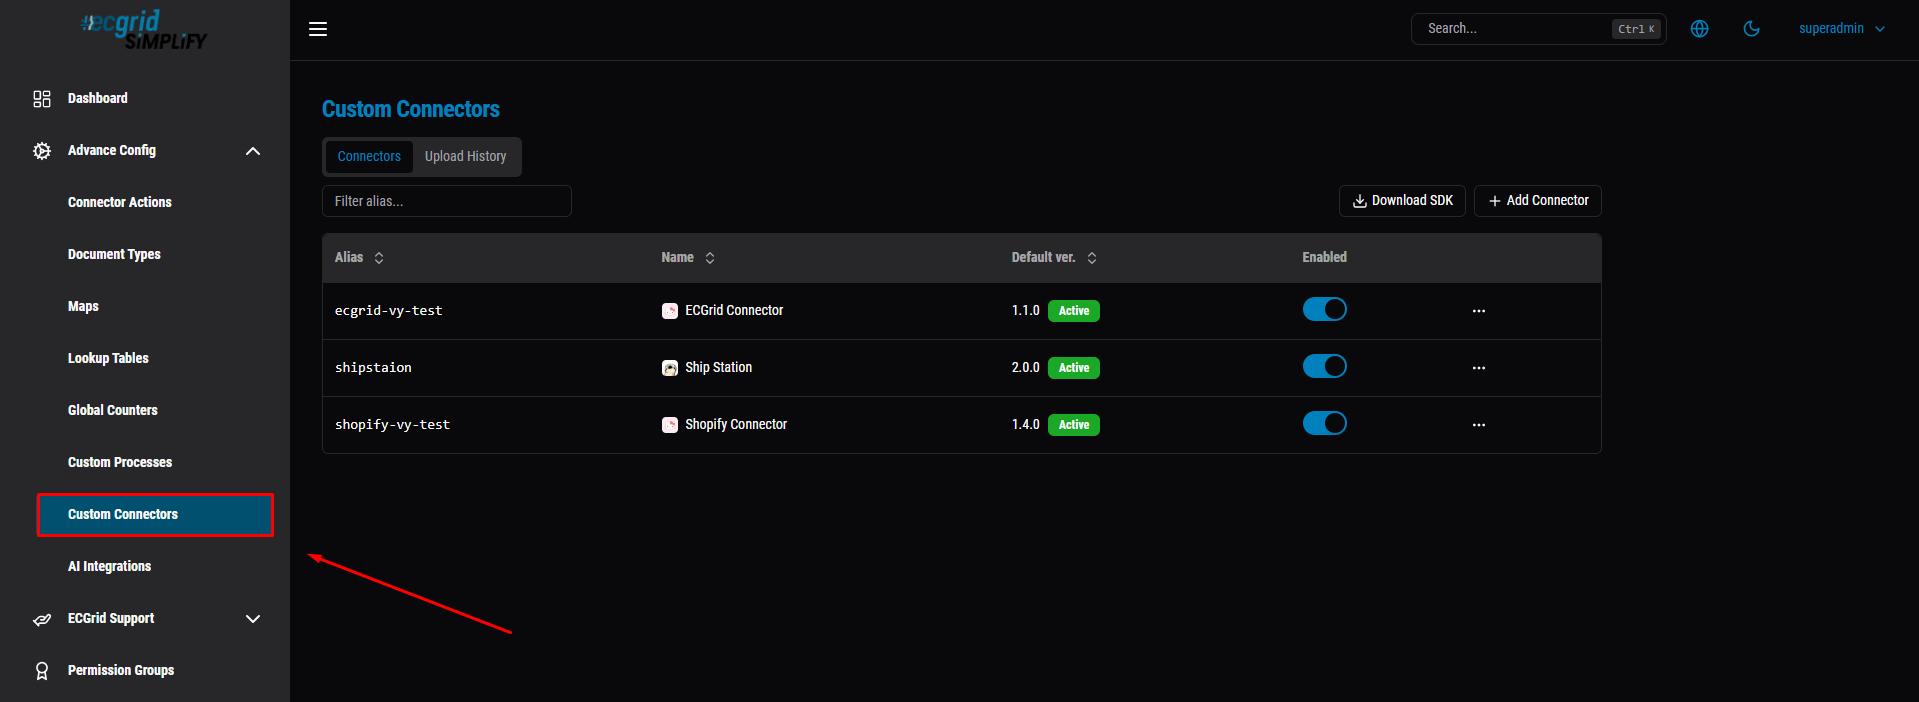
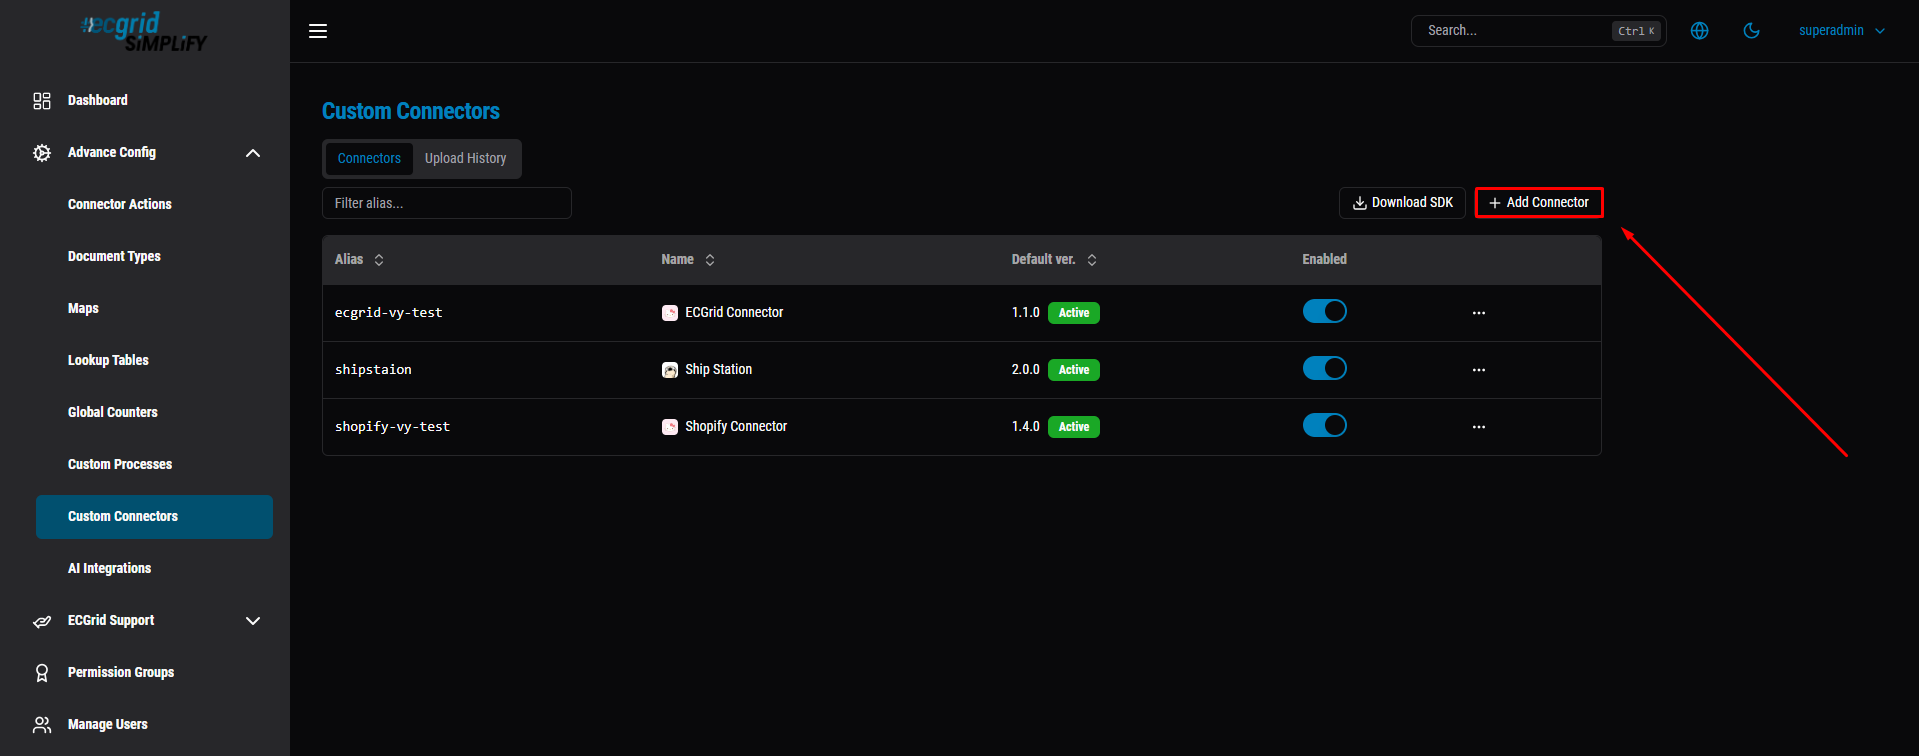
2. Register the connector: go to Custom Connectors (under Advance Config) -> Add Connector -> fill in Alias, Name, Version, upload the .zip artifact.
To add the Connector: Click Add button.
To fill in the form: enter a unique Alias (e.g. sample-connector) and a display Name (e.g. Sample Connector), then continue filling in Version and uploading the Artifact (.zip) before clicking Add.
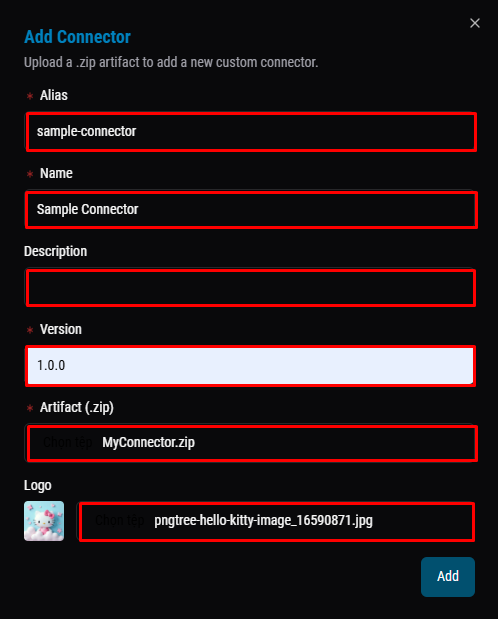
- Alias: a globally unique identifier for the connector (
[a-z0-9-]{1,37}- lowercase letters, numbers, hyphens, max 37 chars), e.g.sample-connector. Used to build the webhook URL and identify the connector internally. - Name: the display name shown on the UI, no format restriction, e.g.
Sample Connector. - Description: optional short note, just for readability.
- Version: the first version of the connector, must be valid SemVer (
MAJOR.MINOR.PATCH), e.g.1.0.0. - Artifact (.zip): the zip containing the built/published connector DLL (with
.deps.json, withoutSimplify.Connectors.SDK.dll) - the actual code that will run. - Logo: optional icon shown for the connector on the UI.
Then, click the Add button: To see the new connector.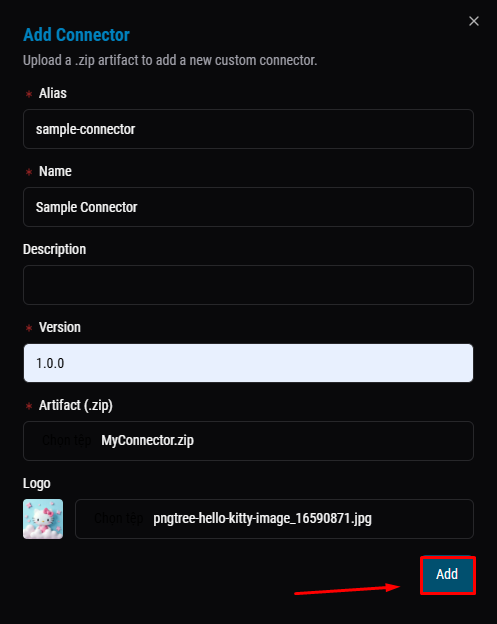
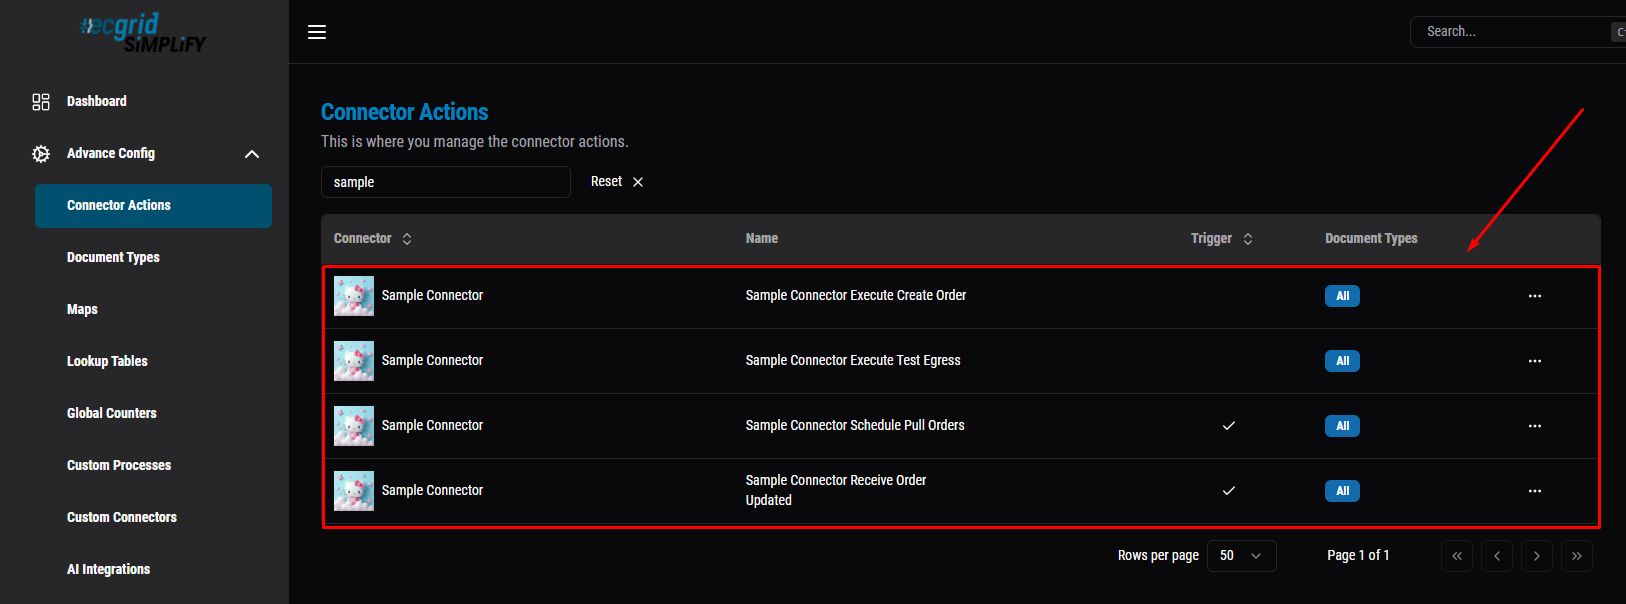
3. Check Connector Actions: once Register succeeds, the Connector Actions page auto-lists every Trigger/Action declared in Configure() - confirm the names match your code.
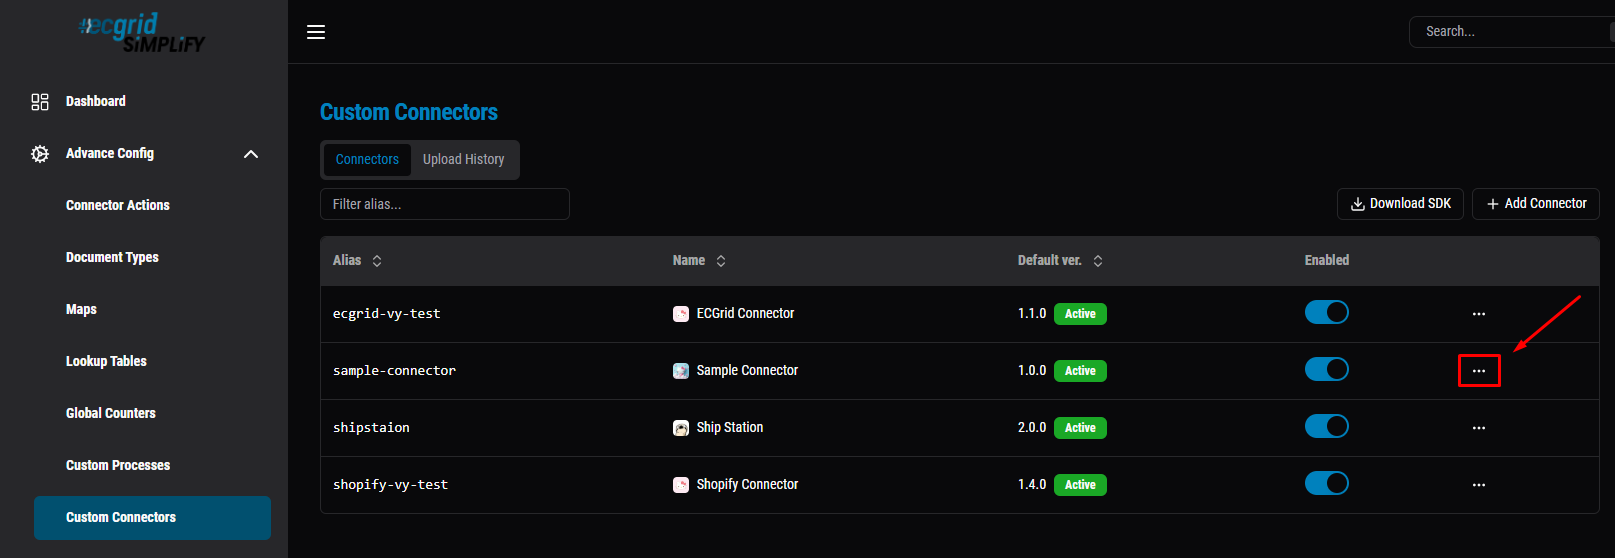
4. Upload a new version (whenever the code changes): Custom Connectors -> "..." -> Upload New Version -> pick the new .zip, enter the new SemVer version.
Click the "..." menu next to the connector row (e.g. "sample-connector") to open its action menu.
Select "Upload new version" from the dropdown (alongside Detail, Edit, Delete) to open the Upload New Version dialog.
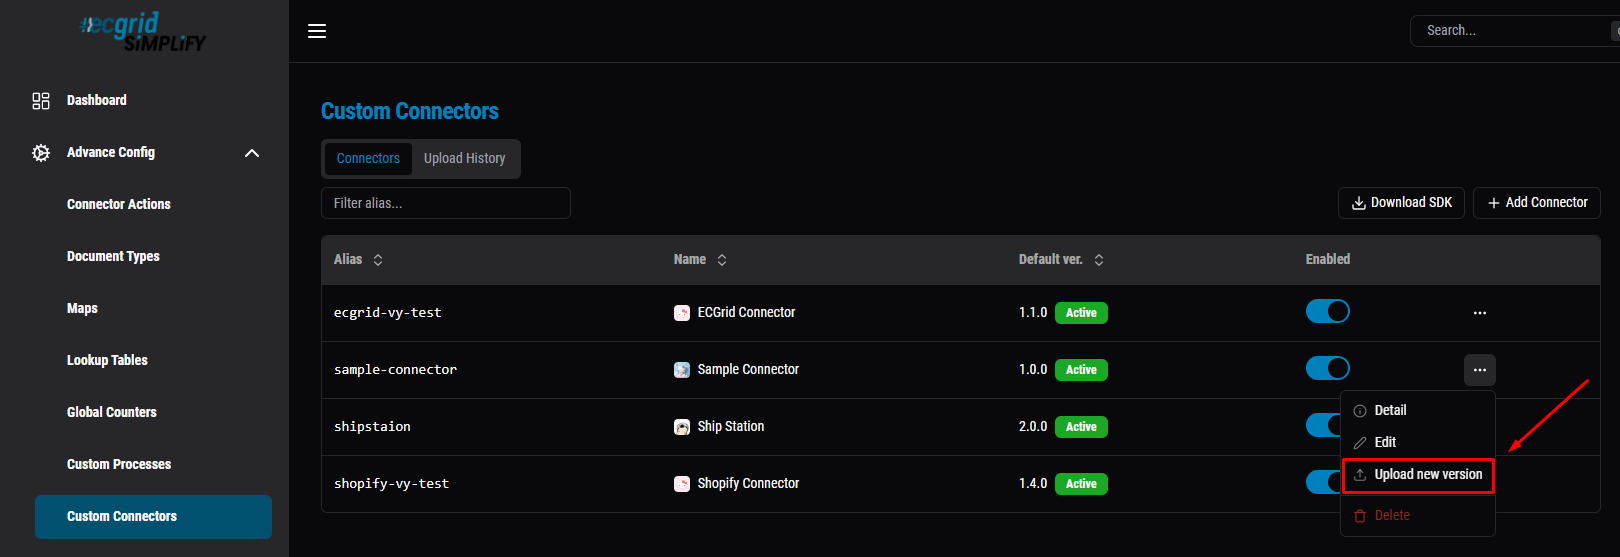
Fill in the new Version (e.g. 1.0.1, must be higher than the current one) and pick the updated Artifact (.zip), then click Upload. Note: this only adds the new version — it does not become the Default until you promote it (see step 5).
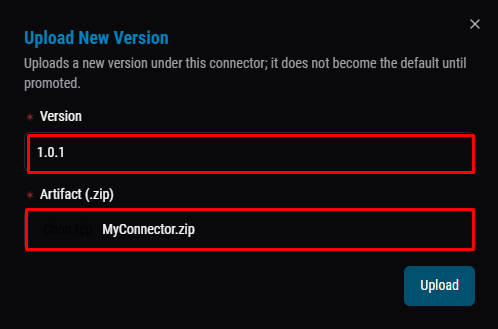
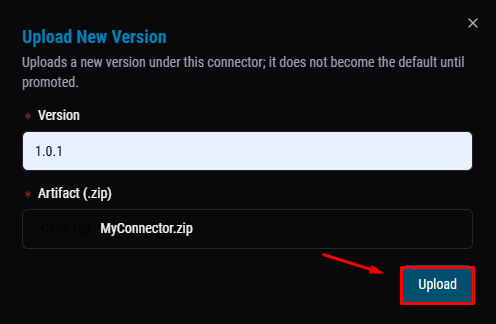
Click "Upload" to finish — the new version now appears in Version History, but is not the Default yet until you explicitly promote it (step 5).
5. Set as Default: open the Version History tab -> pick the new version -> Set as Default.
Back in Custom Connectors, click the "..." menu next to the connector row again — this time choose "Detail" to open the Version History tab, where you'll pick the new version and promote it to Default.
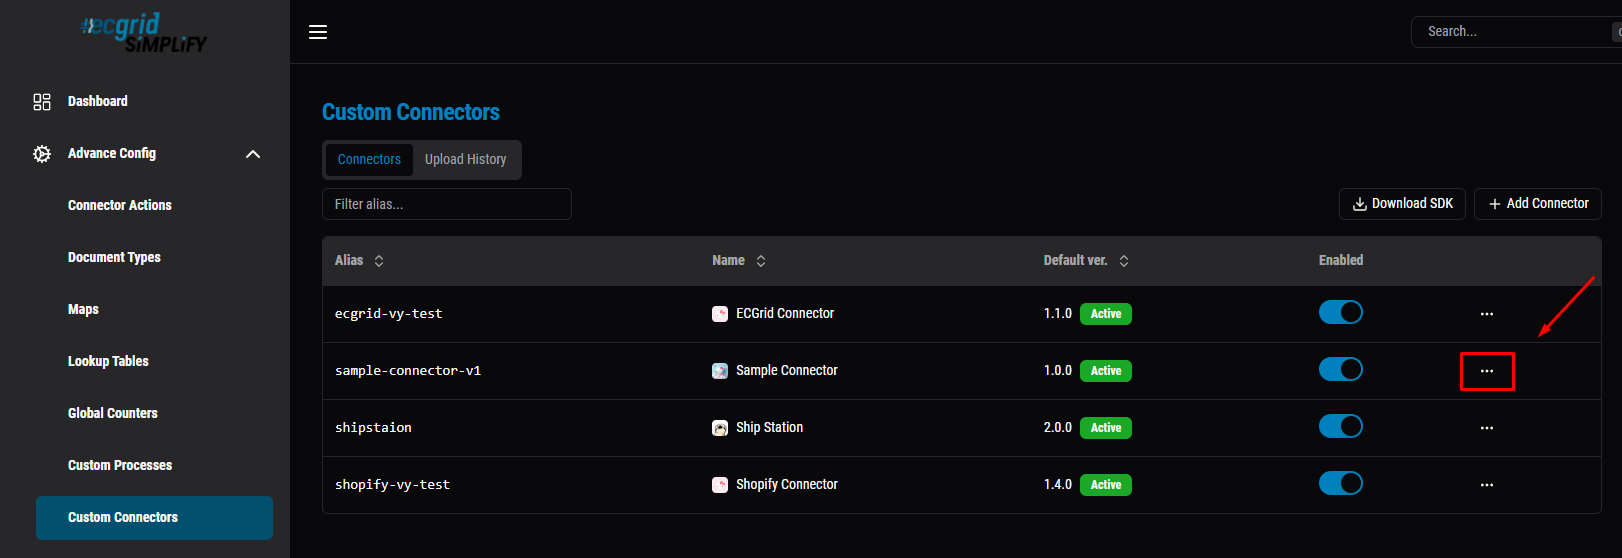
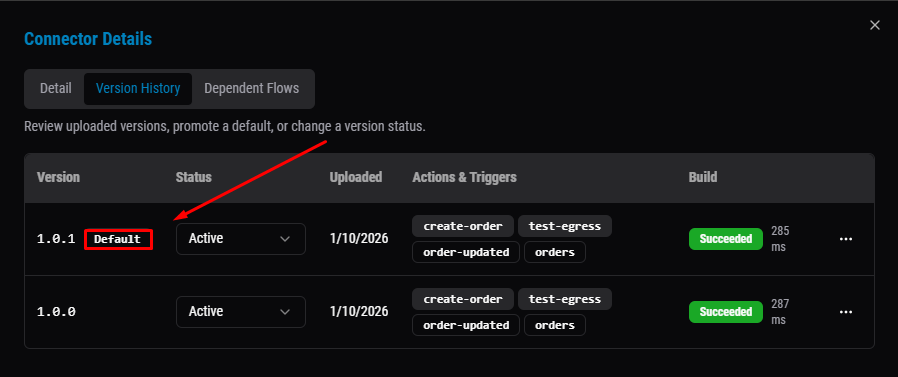
Click "Detail" from the menu, then switch to the "Version History" tab — it lists every uploaded version with its Status. The version currently marked Default (here, 1.0.0) is the one that actually runs; 1.0.1 is uploaded but not yet promoted.
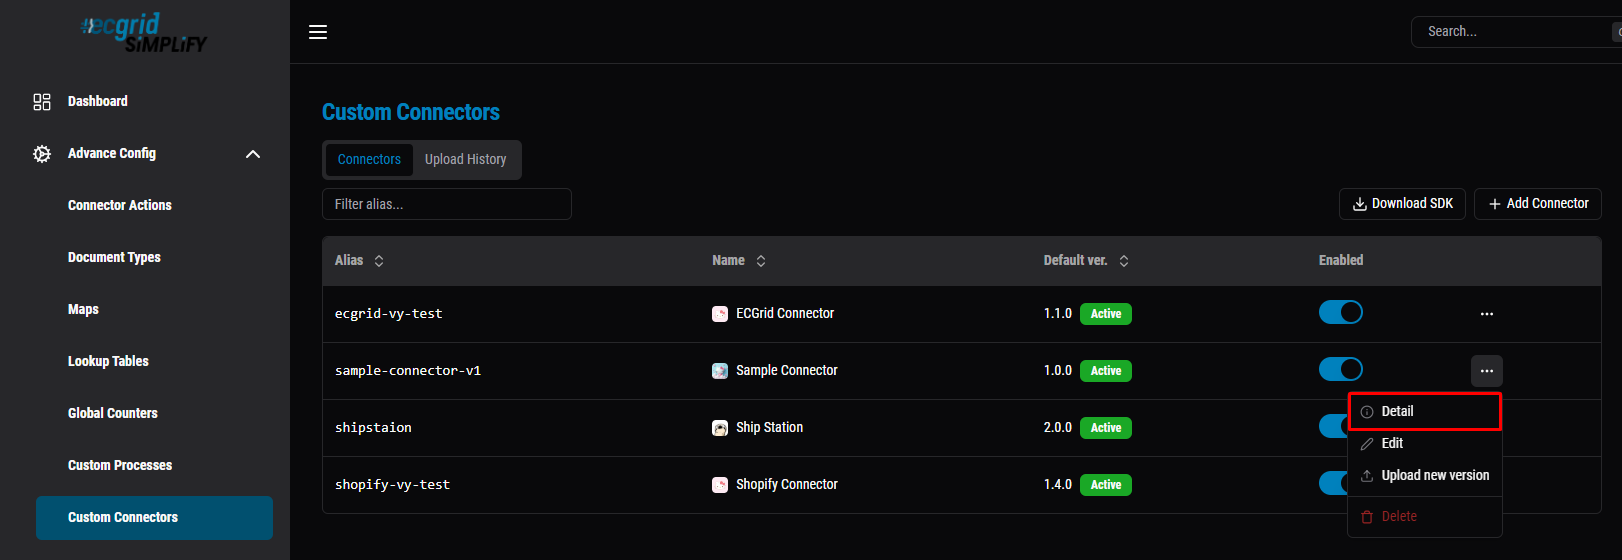
The Version History tab lists every uploaded version. Here, 1.0.0 is marked Default (the one that actually runs), while 1.0.1 has been uploaded but not promoted yet.
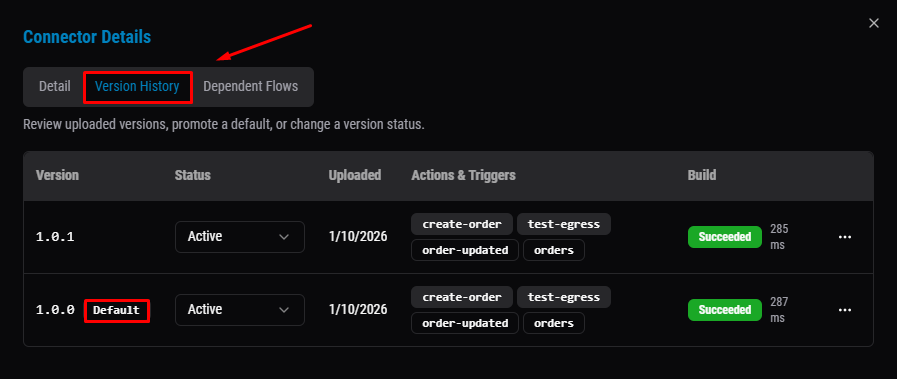
Click the "..." menu next to the new version row (1.0.1) to open its options — from there, select "Set as Default" to promote it.
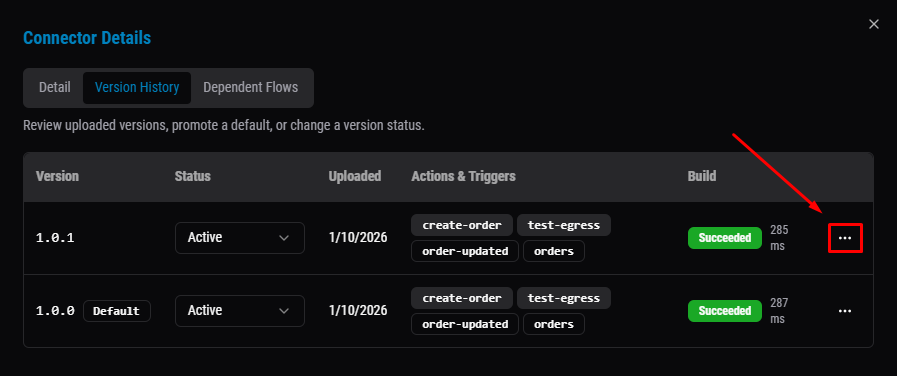
Select "Set as default" from the dropdown menu.
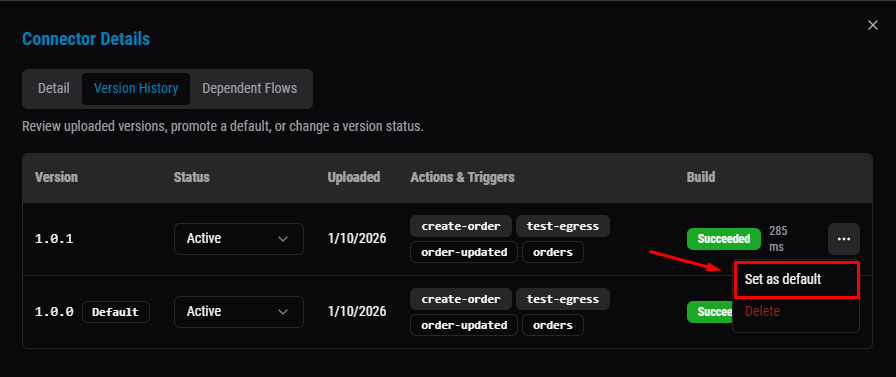
Done — 1.0.1 is now marked Default, and 1.0.0 loses that label. This is the version that will actually run on the next Trigger/Action.
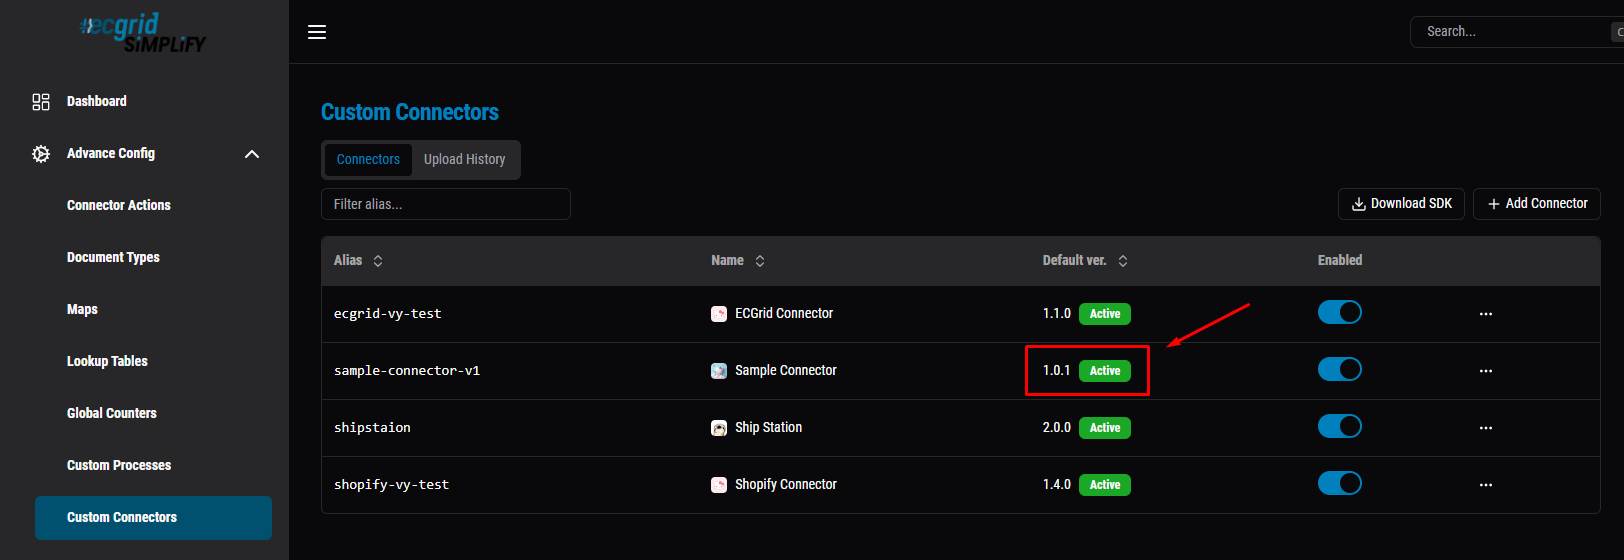
Back in the Custom Connectors list, the Default ver. column now shows 1.0.1 — confirming the new version is live as Default.
Note: Setting a version as Default here is not enough on its own to use it. You also need to go into the Customer account and update the Version field on the Connection itself (step 6 below) - this section will show you how to add a Connection under the Customer account and switch it to the new version.
6. Create a Connection: go to My Connections -> + Add Connection -> pick the connector -> fill in Connection Name, External ID, Version, and the Auth fields declared via Field() (e.g. shopDomain, apiKey).
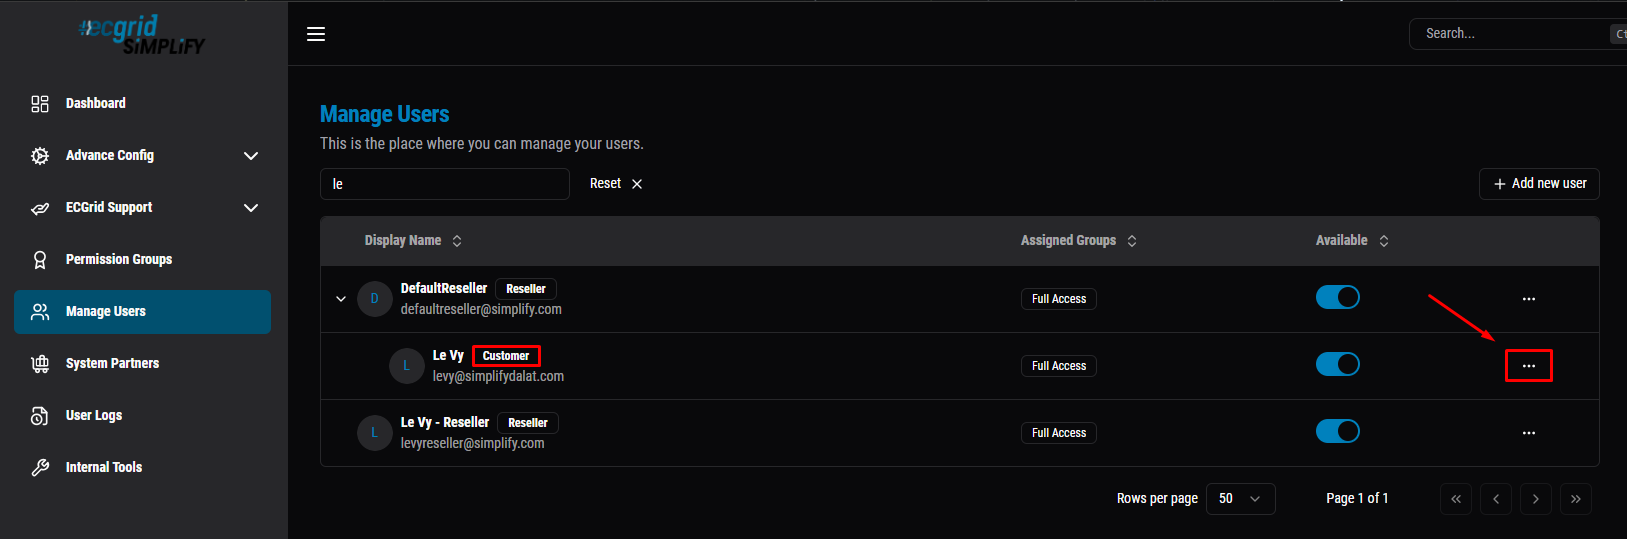
Go to Manage Users (left sidebar) to see all users and their role group (Customer / Reseller). Find a user under the Customer group, then click the "..." menu next to their row.
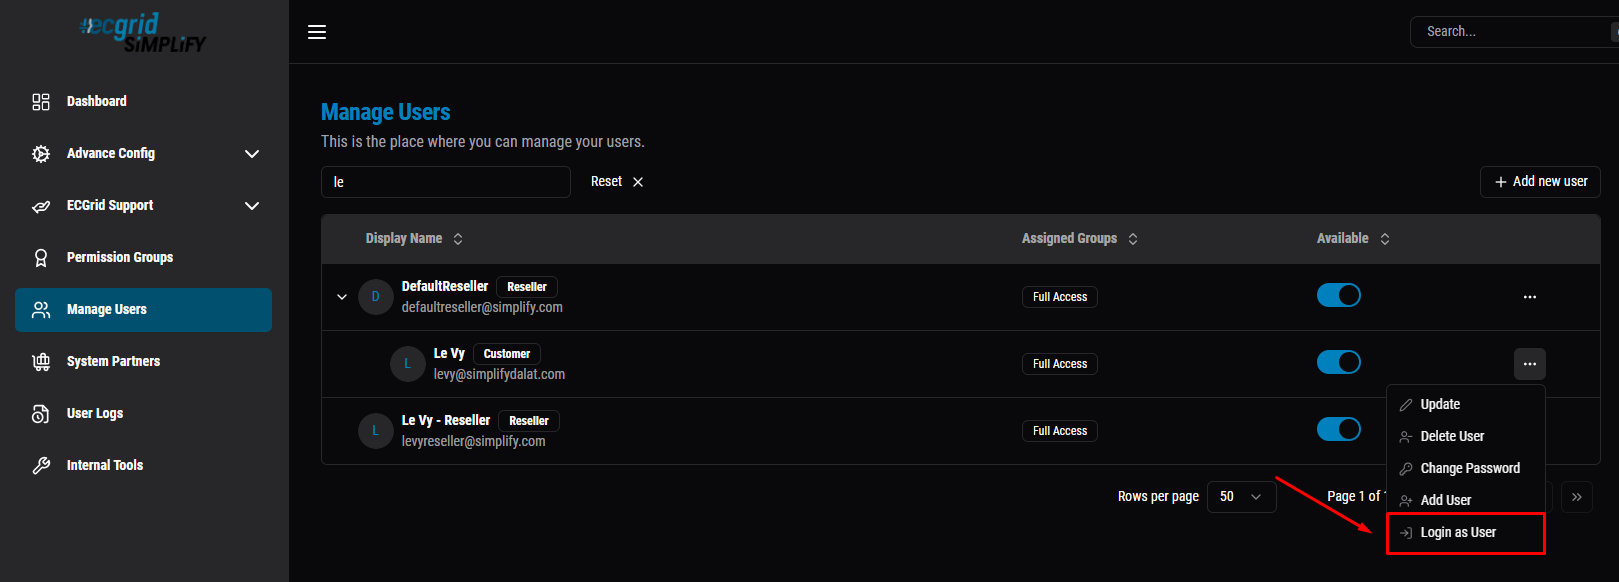
From the dropdown, select "Login as User" — this switches your session into that Customer account, which is required to see My Connections and add a Connection.
Under the Customer account (notice the "Stop Impersonation" banner at top, confirming you're logged in as that user), go to My Connections -> click "+ Add Connection".
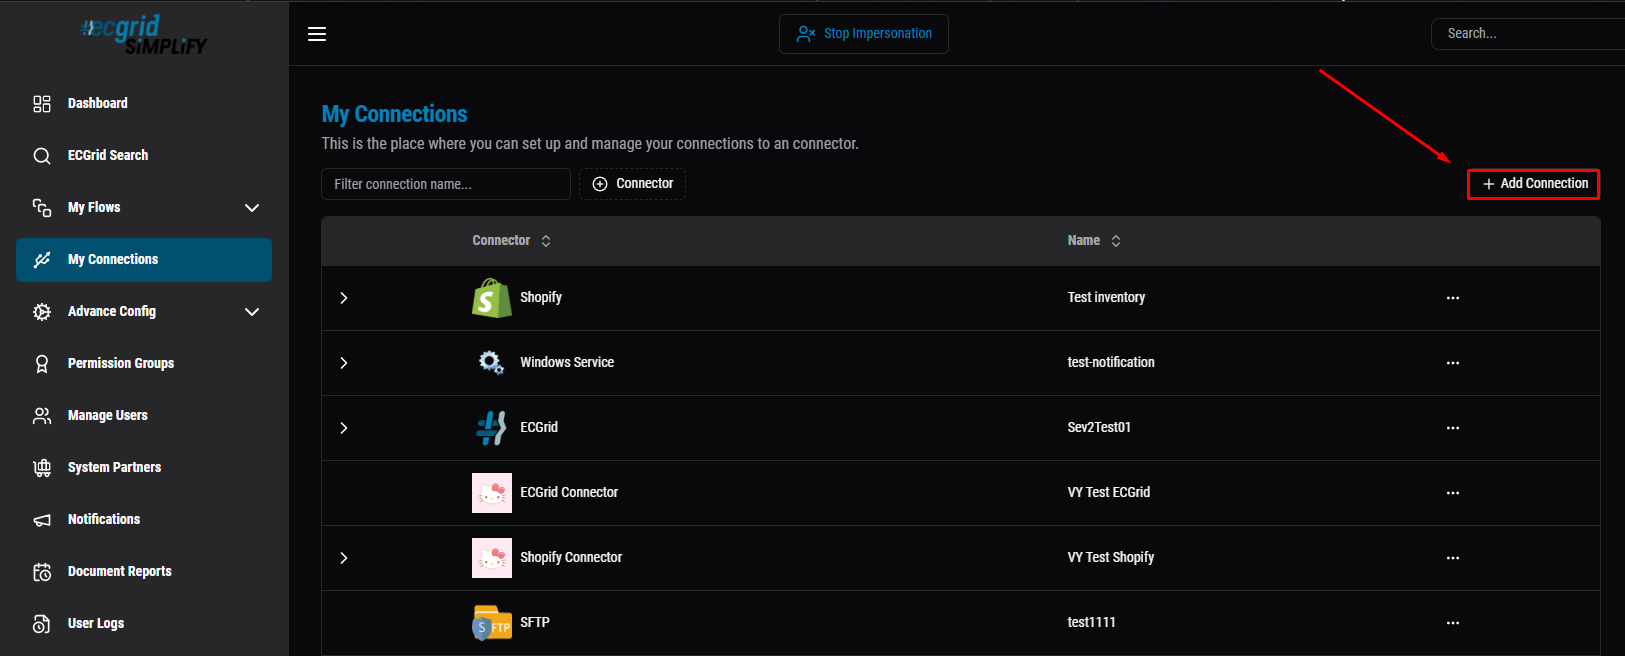
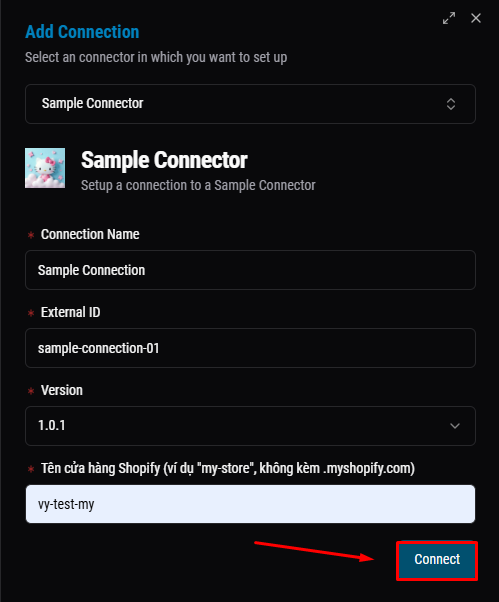
In the Add Connection dialog, pick the connector you want to set up from "Select connector".
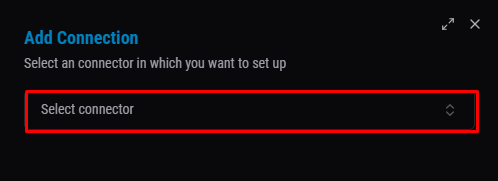
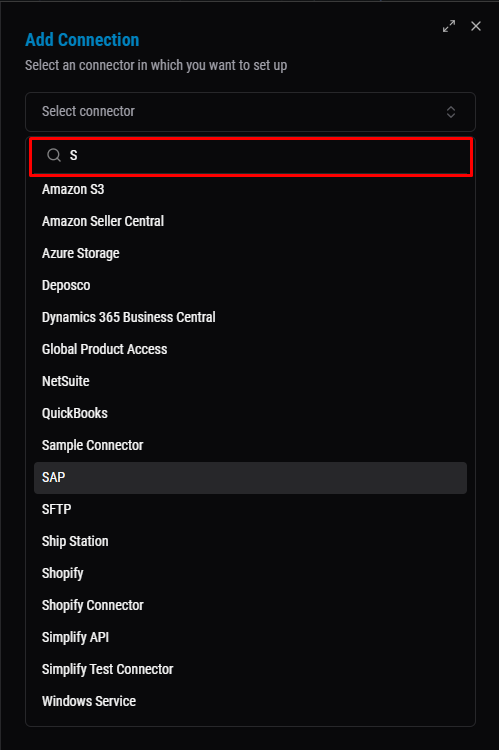
Search and select "Sample Connector" from the dropdown list (có thể gõ tìm theo tên để lọc nhanh).
After searching and selecting your connector, fill in the form below:
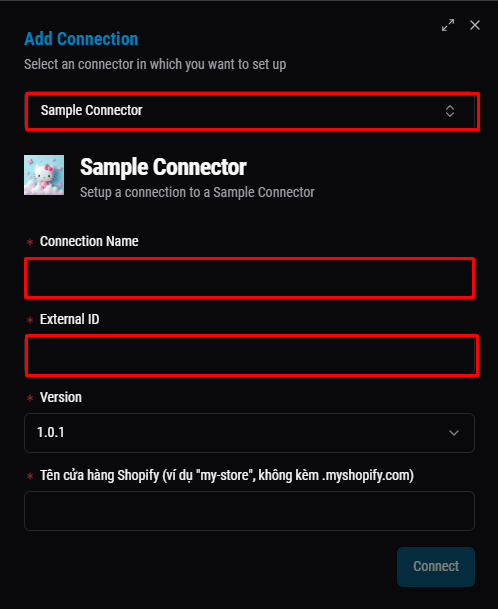
- Connection Name: a display name for this Connection, shown in the My Connections list - just for readability, no effect on logic.
- External ID: an identifier for this Connection used by external systems/APIs to look it up or link data to it.
- Version: which uploaded version of the connector this Connection will use. This is a separate field on the Connection itself - it does not automatically follow the "Default ver." set on Custom Connectors, so you must manually pick the newest version here (as noted in step 4 above).
- (Provider-specific field, e.g. "Shopify store name"): a field declared by the connector itself via
IAuthBuilder.Field(key, label)- the customer fills it in so the connector knows where/what to connect to (e.g. a store domain, API key). This field differs per connector.
Once all fields are filled in, click "Connect" — for AuthType.OAuth2 connectors like Shopify, this redirects you to the third-party's own authorize page to approve access; for AuthType.ApiKey, it connects immediately.
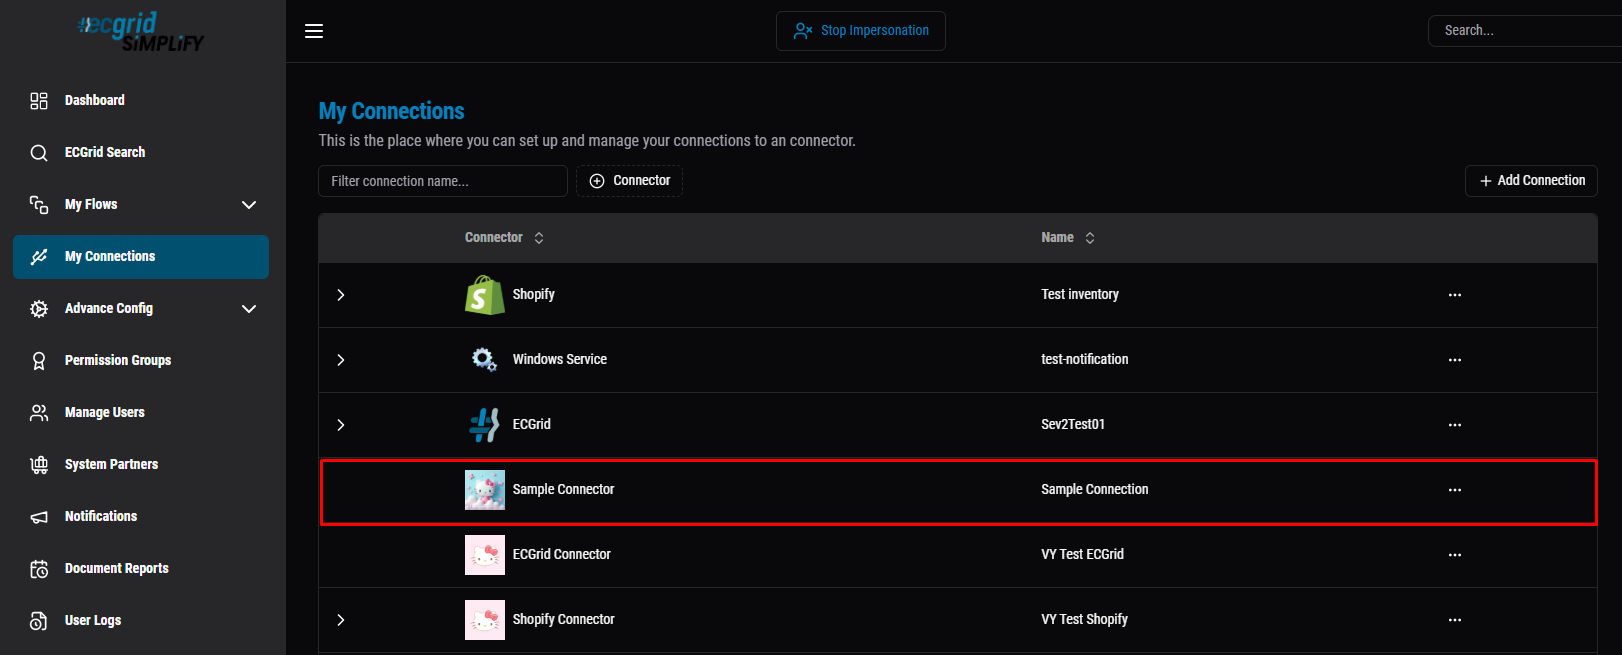
Back in My Connections, the new Connection now appears in the list ("Sample Connector" / "Sample Connection").
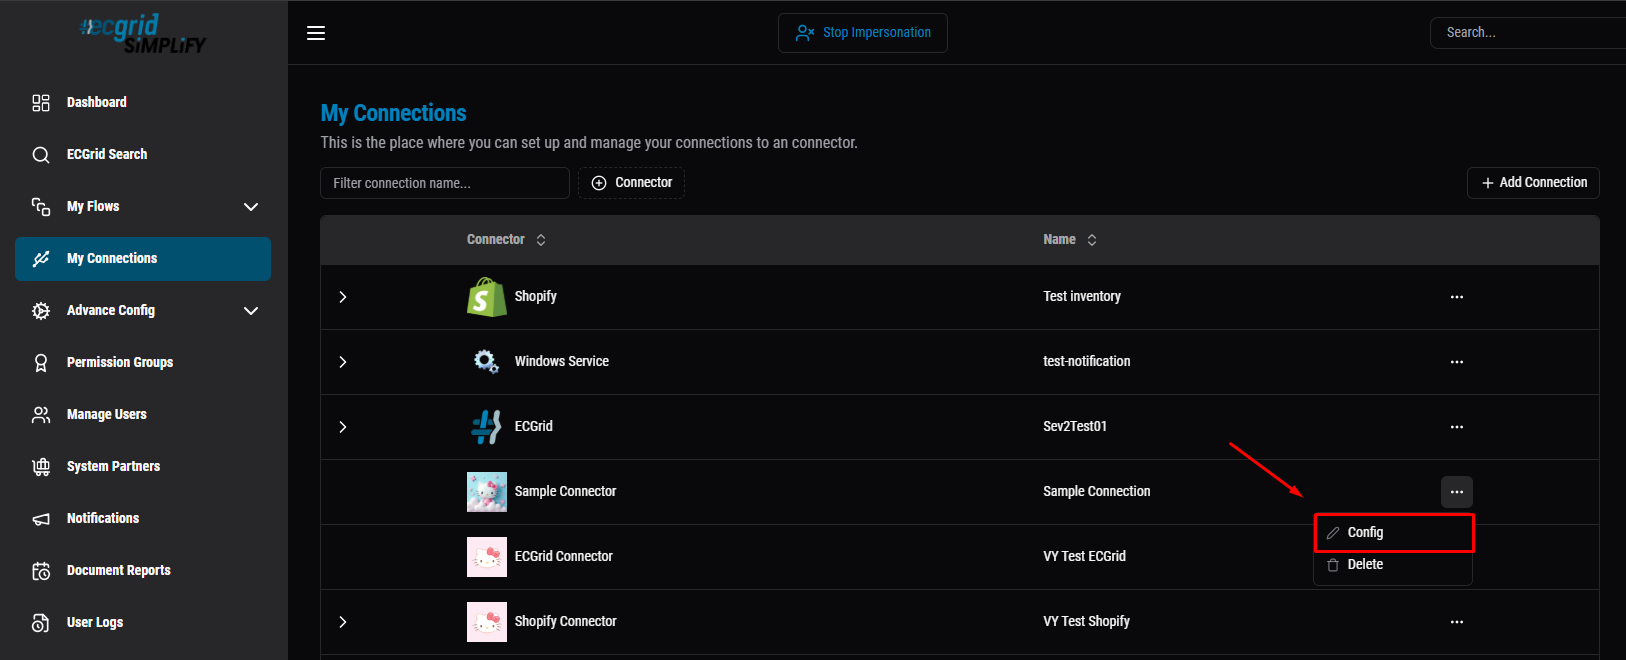
To change the Connection's Version later (e.g. after promoting a new Default version - see the note in step 4), click the "..." menu next to the Connection and select "Config" to reopen the same form and update the Version field.
Click the Version dropdown to see all versions - confirming this field exists separately on the Connection, independent from the connector's "Default ver.".
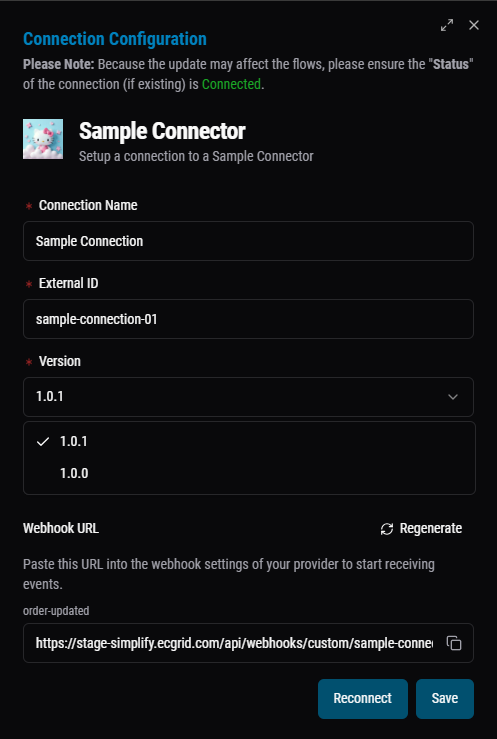
After picking the version you want (here switched to 1.0.0), click "Save" to apply it to this Connection.
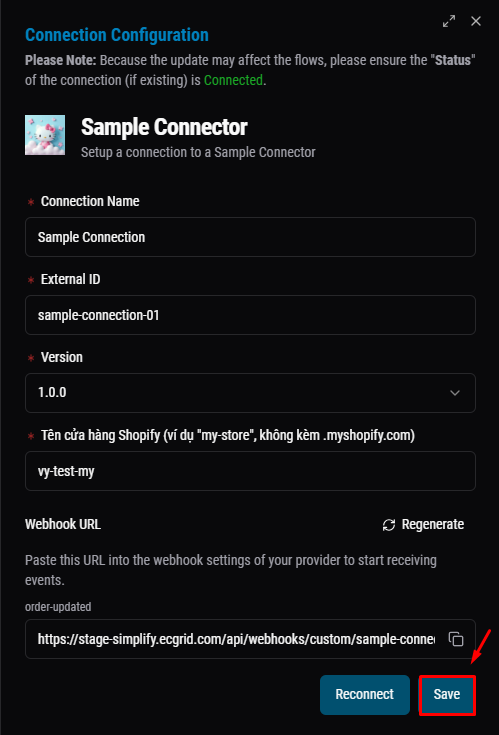
7. Connect: for AuthType.OAuth2, clicking Connect redirects to the third-party's own authorize page, then back on success; for AuthType.ApiKey, just enter the key and Connect directly.
8. Build and run the Flow: the general steps for creating a Flow (Add Flow, Add Trigger, Add Action, Condition/Partner setup) are already covered in How to set up basic flow in Simplify How to set up basic flow in Simplify - follow that article for the mechanics.
The one thing specific to custom connectors: when picking Document Type for your Trigger and Action steps, it must match the shape your connector's ConnectorResult.Content actually returns (see section 9b above) - picking the wrong one is the most common cause of a Rejected document.
Once set up, save the Flow, toggle it Enabled, then Trigger it (manually, or wait for the schedule) and check Flow Activities for the result.
Was this article helpful?
That’s Great!
Thank you for your feedback
Sorry! We couldn't be helpful
Thank you for your feedback
Feedback sent
We appreciate your effort and will try to fix the article